



You can learn to bread chicken for the tastiest crispy chicken
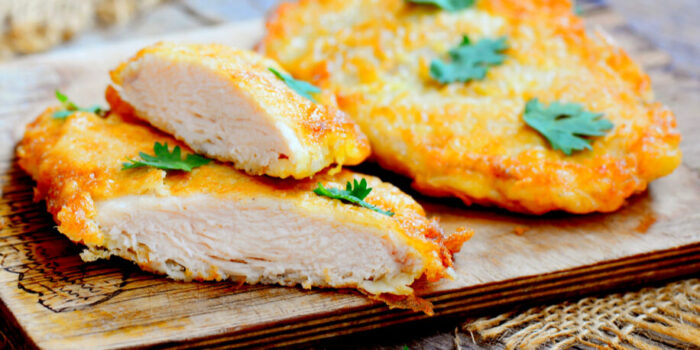
There’s nothing I’d rather be woken up for than breaded chicken with such a crunchy, crispy coating. And sure, it’s fun to hop around the city tasting the best fried chicken sandwiches everywhere, but breading and frying a juicy chicken (thigh) fillet at home can be just as delicious! And often a little healthier too…

But what’s super annoying is when your carefully prepared crispy coating slides or falls off the chicken in the hot pan, leaving you with burnt bits of ‘batter’ floating in the fat and a sort of sad, half-covered chicken fillet with bare patches. Here’s how to prevent that and enjoy beautifully evenly breaded fried chicken every time:
How to bread chicken
Essentially, you create a workstation with three deep plates next to one another for three steps, but the very first, essential step is to dry the chicken fillet thoroughly with kitchen paper (for convenience, let’s call it chicken fillet here, but it could just as easily be chicken thigh fillet, drumsticks or thighs). And when it comes to kitchen paper, I know from experience that cheap often ends up being expensive; not long ago, I was standing there swearing while holding an expensive steak under the tap because there was no other way to remove the cheap kitchen paper stuck to it after I’d frantically picked at it…
Three plates, three steps
This workstation is a sort of conveyor belt, except the belt is stationary and you move. It can also make a difference whether you’re left- or right-handed when deciding which direction you want to work in. In any case, the first plate contains flour, the second beaten egg with a few drops of milk or water, and the third your crispy component. This can be breadcrumbs (Japanese panko is genuinely the lightest, tastiest breadcrumb there is, and it gets mega crispy), but crushed (unsweetened) cornflakes or crackers are also fun to try. Very important: season every plate with at least salt and pepper, plus whatever herbs and spices you want to use. Not just the last plate, as many people do. Some of the outer coating will probably be lost, so make sure the flour and beaten egg are seasoned too, so the inside is well seasoned as well.
Prepared chicken
Coat the chicken in flour and shake off the excess. Then dip the chicken into the plate with egg and, finally, into the breadcrumbs. It’s handy to do the first step with one hand and the next two with the other. That way you won’t get egg on your flour hand, which saves a lot of mess. Now place the breaded chicken on a large plate in the fridge and leave it undisturbed for 15 to 30 minutes. This is important! Some of the moisture from the chicken and egg will be absorbed by the flour, creating a better ‘glue layer’ for the breadcrumbs, which means they’re less likely to fall off in the pan later.
Just a little more patience
But make sure you don’t throw the breaded chicken straight into the hot fat after that half hour in the fridge. It first needs to come back to roughly room temperature (don’t worry, the drying process won’t immediately be undone), because placing cold chicken in hot fat cools the oil down. That means you won’t get a crispy crust, but a limp, greasy one instead, because the frying temperature is too low. So wait another 15–30 minutes first, then fry until deliciously golden brown.
Bonus tip
If you happen to have pasteurized egg whites at home for the whiskey sours (I’m not the only one, am I?!), you can use those instead of a beaten egg. The main thing is to have a kind of ‘glue’ layer, which could also be made with mayonnaise or mustard. But egg (white) in particular sets very well in the hot pan, meaning those delicious crumbs stay put better.
Also read:
- Crispy breadcrumbs on everything
- 7x the tastiest schnitzels from around the world
- Recipe: easy spicy chicken satay
Source: The Spruce Eats


